Have you ever wanted to play with a multi-subnet SQL Server configuration for Availability Groups or Failover Clustering with SQL Server 2012 or higher? Getting an environment setup to support multiple subnets is not trivial, and a lot of times if you look online for information about how to configure routing for multiple subnets you will find a recommendation to use a Linux based VM separately as a router/appliance to handle the routing. In this blog post I’m going to show you how to setup a virtual environment with a single Windows Server 2012 R2 server that performs the role of Active Directory Domain Controller, DNS server, DHCP host, and as a router for multiple subnets as the basis for a multi-subnet virtual environment for testing and playing with multi-subnet configurations for SQL Server 2012 and higher. I am building this environment in VMware Workstation 10, but the same configuration can be performed under any hypervisor that supports multiple virtual network configurations, once the host configuration of the virtual networks has been appropriately configured. VMware Workstation makes this configuration very easy through the Virtual Network editor that is included as a part of the VMware Workstation implementation.
Initial VM Configuration
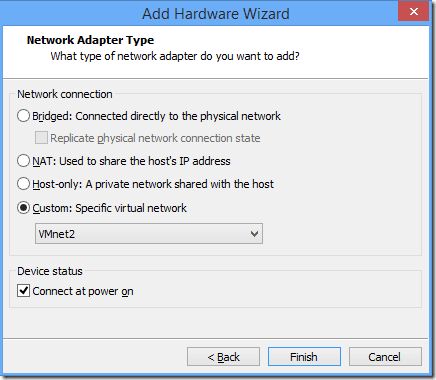
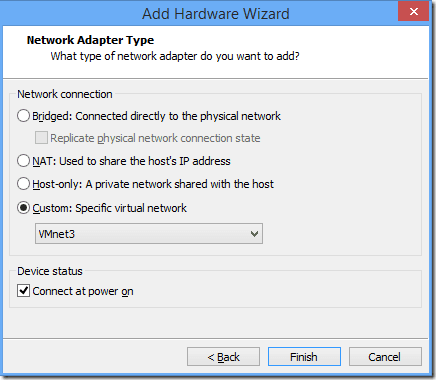
For the initial VM setup, I created a VM with 2 vCPUs and 2GB RAM and then edited the settings to change the virtual network adapter settings to add two new network adapters to the VM. The default setup includes one virtual network adapter for NAT, so I am going to add one network adapter on VMNet2, then add another adapter on VMNet3 as shown below.
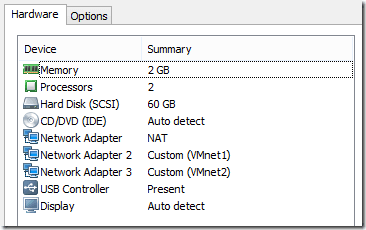
The final hardware configuration for the VM should then look like this:
Now we can install Windows Server 2012 R2 and setup our basic server configuration. In this case I’ve changed the name of the server to be DC, and set static IP’s to each of the network adapters, 192.168.52.1 for VMNet2, and 192.168.53.1 to VMNet3.
To properly identify each adapter, you can edit the VM settings and disconnect them one at a time so it shows Network cable unplugged for the network connection. I usually set the NAT adapter to disconnected unless there is a need to have the VM connected to the internet through the host internet connection for some reason. Once this has been done we can proceed to setup the server as our Active Directory Domain Controller, DNS server, DHCP host for the networks, and as a Router between the two subnets.
Configuring Active Directory Domain Services
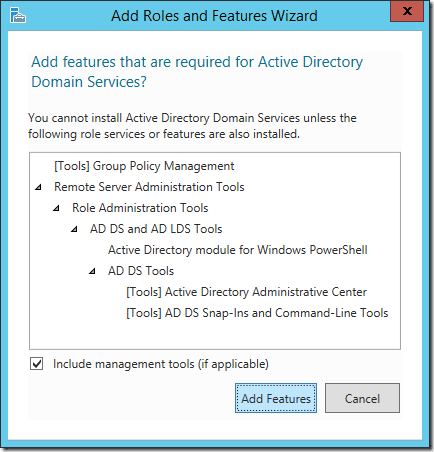
To setup Active Directory Domain Services, open the Add Roles and Features Wizard, and then check Active Directory Domain Services as a role for the server. It will open a popup window shown below to add additional features required by Active Directory Domain Services. Click the Add Features button then click Next twice followed by the Install button.
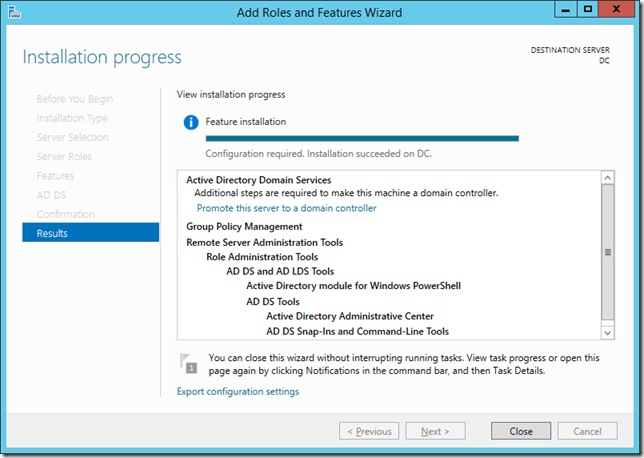
When the installation finishes, don’t click the Close button. Instead click on the link that says Promote this server to a domain controller to launch the Active Directory Domain Services Configuration Wizard.
Click Close
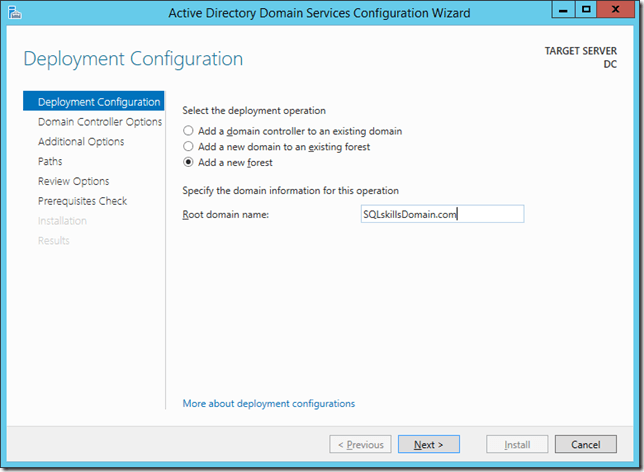
Click the Add a new forest radio button, then add the Domain Name and click Next
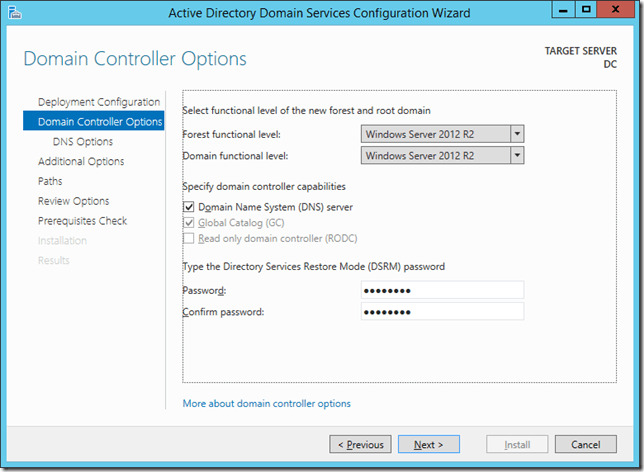
Set the domain functional level and then specify the recovery password and click next
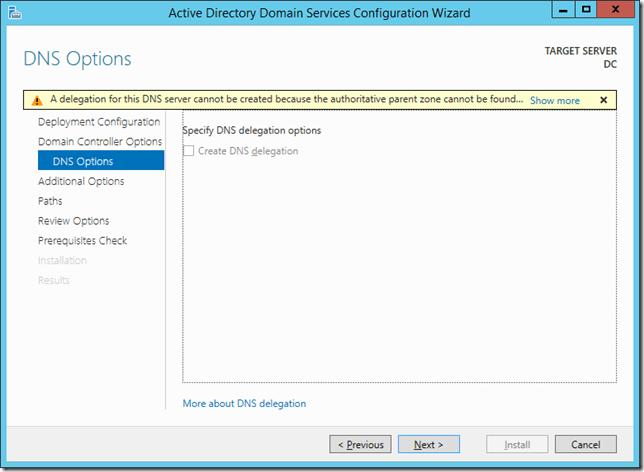
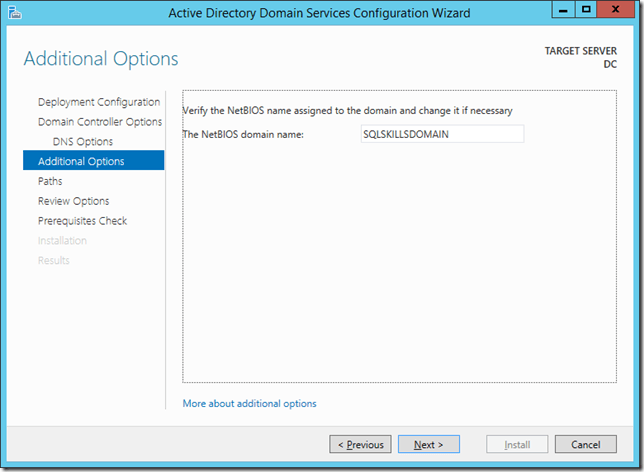
Click Next
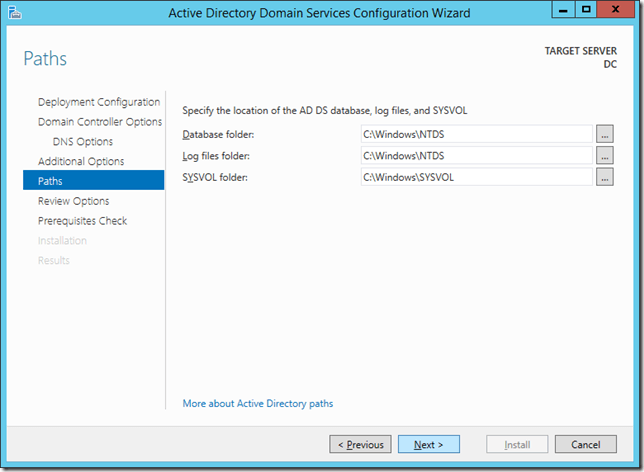
Click Next
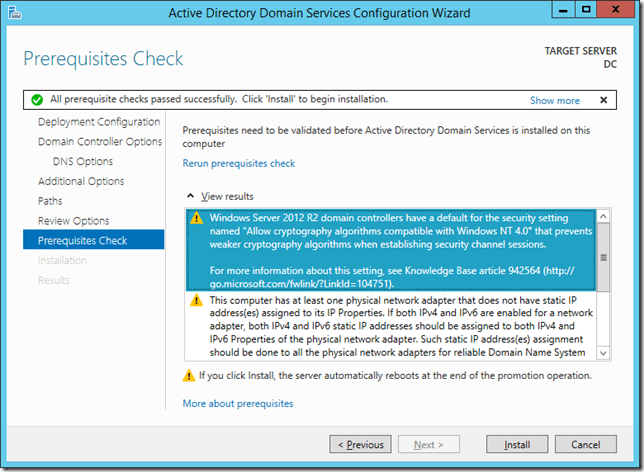
Click Next and wait for the prerequisites checks to complete
Click Install and it will finalize the configuration of the Active Directory Domain Services on the server making it a new Domain Controller in the environment. When it finishes Windows will prompt to sign you out as shown below, and then the VM will reboot.
Configuring DHCP
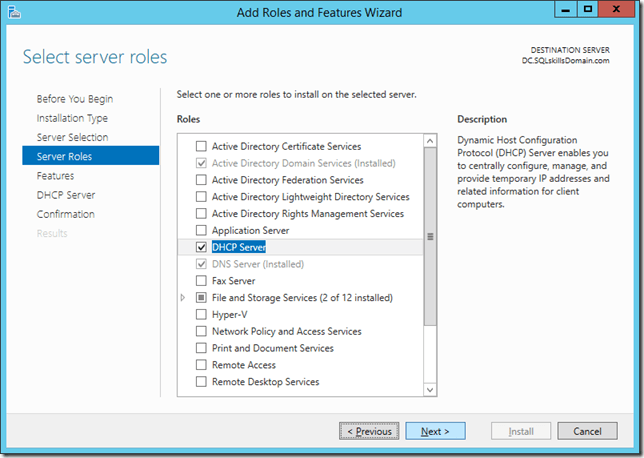
Configuring DHCP is not required, but it simplifies creating all the remaining VMs by automatically configuring their network settings based on the VMNet that they have been assigned on the virtual network adapters. Open the Add Roles and Features Wizard and add the DHCP Server role to the machine.
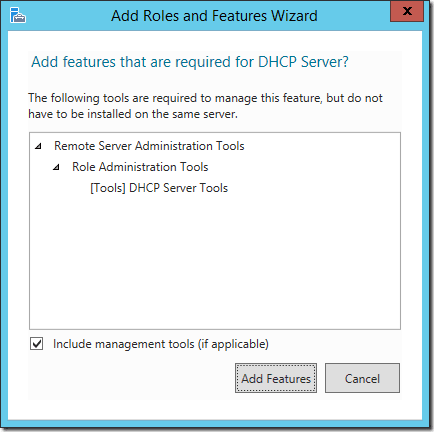
A popup will open with the additional features required and you can click Add Features.
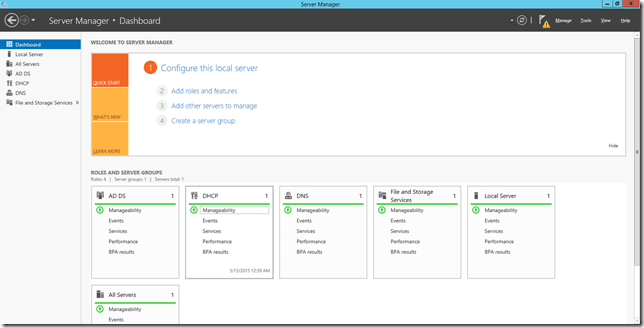
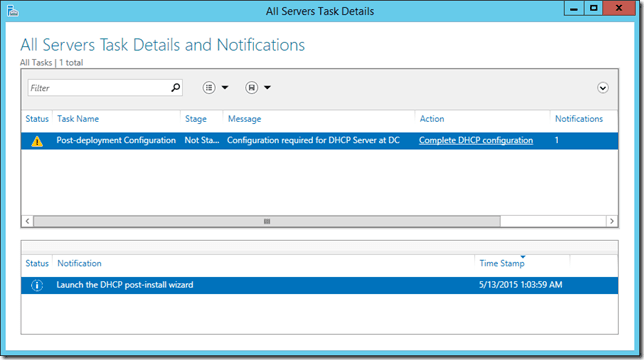
Then click Next, followed by Install and when the installation finishes you can click the Complete DHCP Configuration. If you mistakenly click Close, you can still complete the configuration by opening Server Manager and then clicking on Manageability under the DHCP box.
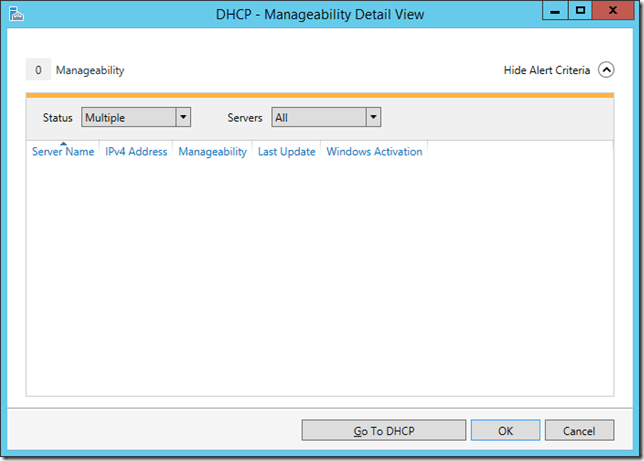
This will open up the Manageability Detail View shown below.
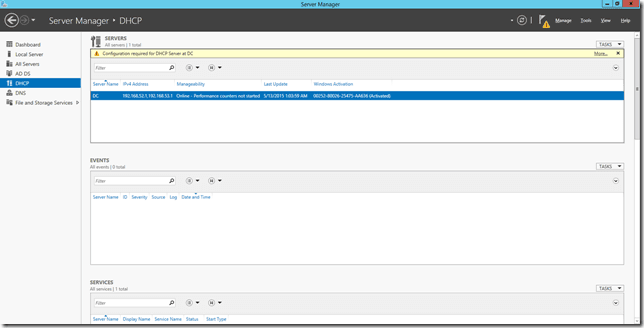
Click Go To DHCP.
Click the More link at the top in the yellow bar to the far right
Click the Complete DHCP configuration link.
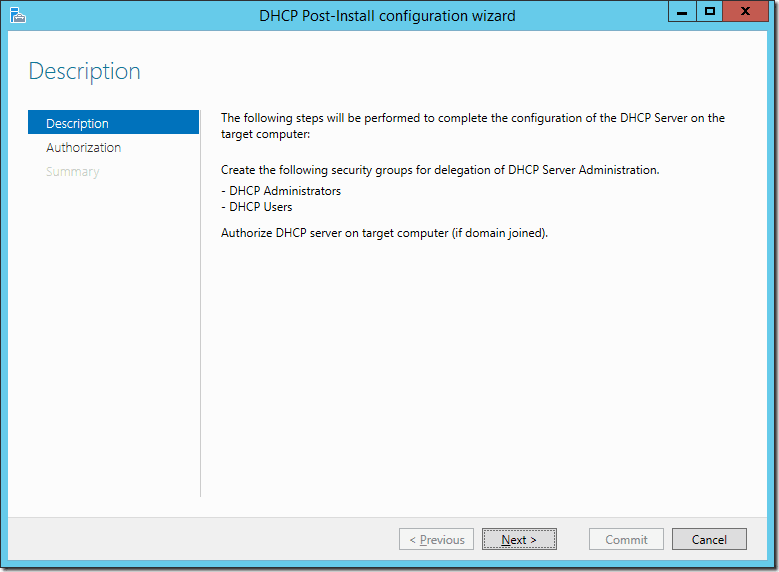
Click Next
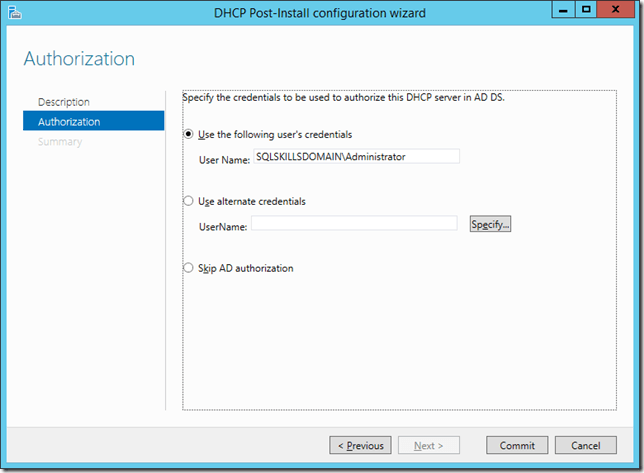
Click Commit
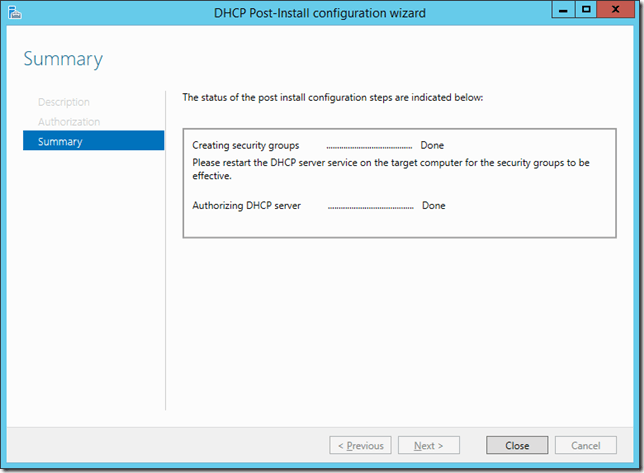
This authorizes the server to be a DHCP host, so now we need to customize the configuration of DHCP. Click the Start button then type in DHCP and open the DHCP console.
Right click on the IPv4 and choose New Scope then click Next.
I name the scopes by the Subnet they apply to so in this case 192.168.52.x and once we complete this scope a second will have to be made for the 192.168.53.x subnet by simply repeating these same steps and using that subnet for the gateway and DNS server addresses.
Set the starting and ending IP address range for the scope and click Next. Then click Next on the Add Exclusions and Delay and Lease Duration windows.
On the Configure DHCP Options page, make sure it says Yes, I want to configure these options now and click Next.
Add the local IP address for this server as the Router address, in this case 192.168.52.1 and click Add, then click Next. (For the second scope you will use the other IP address, in this case the 192.168.53.1 address)
If the IP Address for the DNS Server is not the local address for the subnet, remove any existing IP addresses, and add the local IP address for the subnet, in this case 192.168.52.1 as the DNS server and then click Next. (Again, for the second scope you will use the other IP address, in this case the 192.168.53.1 address)
Remove any WINS server IP Addresses and click Next.
Then click Next to activate the scope. Now repeat these same steps for the 192.168.53.x subnet specifying the 192.168.53.1 address for the router and DNS server and activate that scope.
Configuring Routing Between Subnets
To setup routing between the subnets, open the Add Roles and Features Wizard, and then check Remote Access as a role for the server.
Click Next three times and then check the Routing box. It will open a popup window shown below to add additional features required for Routing. Click the Add Features button.
This will also cause the DirectAccess and VPN (RAS) option to become checked as shown below.
Click Next twice and it will have the addition IIS role services window shown below with the required features checked. Nothing needs to be changed here, just click Next again, followed by Install to install the Remote Access Role to the server.
When the installation completes, click Close. Now click on Start and type in Routing and Remote Access and open the Routing and Remote Access management console.
Right click on the server and select the Configure and Enable Routing and Remote Access option.
Click Next on the first window then select the Custom Configuration option and click Next.
Check the box for LAN routing and click Next. Then click Finish.
Now click the Start service button to start the Routing and Remote Access services.
EDIT: After initially publishing this blog post, Thomas Stringer (Blog | Twitter) pointed out that static routes don’t have to be configured and RIP can be used to simplify the configuration of routing. So I am updating this post with the RIP configuration as an additional section. Either option will work but I have to admit that RIP is easier to configure. You only need to configure RIP or the Static Routes, don’t configure both options.
Routing with Routing Information Protocol (RIP)
- Expand the IPv4 folder and right click on General and choose New Routing Protocol.
- Select the RIP Version 2 for Internet Protocol option and click OK.
- Now right click on RIP under IPv4 and choose New Interface.
- Select the 192.168.52.1 interface and click OK.
- Then click OK again.
- Now right click on RIP under IPv4 and choose New Interface.
- Select the 192.168.53.1 interface and click OK.
- Then click OK again.
- Now you are finished.
Routing with Static Routes
Expand the IPv4 folder and right click on Static Routes and choose the New Static Route option.
Select the 192.168.52.1 interface and then add a Destination of 192.168.53.0, subnet mask of 255.255.255.0 and gateway of 192.168.53.1 to create a static route between the subnets.
Now create a New Static route again.
This time, change to the 192.168.53.1 interface and set the Destination to 192.168.52.0, network mask to 255.255.255.0, and the Gateway to 192.168.52.1 and click OK to add the static route between the subnets.
Restart the Routing and Remote Access Services and you’re all set.
Testing
To test the configuration, I created two new VMs named SQL1 and SQL2 with a single network adapter each. SQL1 was configured on VMNet2 and SQL2 was configured on VMNet3, then joined both of the servers to the SQLskillsDomain.com domain. The Windows Firewall needs to be configured to allow ICMP echo packets in the Inbound Rules on each of the servers by enabling the File and Printer Sharing (Echo Request –ICMPv4-In) rule that already exists in the Inbound Rules of the firewall. Once this is enabled on each of the servers, we can test with ping between the VMs as shown below:
SQL1 to SQL2
SQL2 to SQL1
These same steps can be performed in Windows Server 2008R2 and Windows Server 2012, with only minor differences in the configuration of the roles and features. The Routing and Remote Access configuration to provide the routing between the subnets is nearly identical on all three versions of Windows. Once the server is configured, the environment can be used to create a multi-subnet Windows Server Failover Cluster for a multi-subnet Availability Group or even a multi-subnet Failover Clustered instance.






7 thoughts on “Configuring a Multi-Subnet SQL Server Test Environment”
Great post. It’s exactly the way I setup my environment for testing multi-subnet AG.
Nicely put.
I used to create a win based sw router so far.
Thank you so much for this and all your articles Jonathan. We’ve never met but you’ve helped me out more times than I can remember – I love your work!! I’ll be using this information very soon to build a lab for testing AOAG configurations for HA/DR.
Worked like a dream and enabled me to test configure AOAGs in a multi-subnet environment. Many thanks for this and all your fantastic articles which have helped me out of a tight spot more times than I can remember.
I’d just like to say a big thanks, was pulling my hair out trying to figure out what was wrong with my static routes in RRAS and found by accident the tip to use RIP instead here and it works a treat; shows how often I need to use the knowledge I learnt for the MCSE network infrastructure exam…
Big thank You for sharing your knowledge with us and also your courses on Pluralsight and articles always add extra skill into me. . Just FYI you are pinging same thing twice in Testing Phase in this articles.
Regards,
HCP
Thanks for this post, it was incredibly useful!